Showing posts with label recipe. Show all posts

Friday, February 28, 2025

Cake for Breakfast


Today (February 28, 2025) is National Pancake Day.  Who doesn't like pancakes?  Pancakes, like muffins, are an excuse to eat cake for breakfast.  And with pancakes it is acceptable to cover your cake in even more sugar, not to mention butter.  What's not to love?  

I wanted pancakes one day and decided to make them from scratch.  I found this recipe for Best Fluffy Pancakes from  Cafe Delites.  It sounded perfect.  I wanted fluffy pancakes, and nothing against buttermilk pancakes, but I didn't want buttermilk pancakes because every time I buy buttermilk I can only use about a forth of the bottle before I have to throw it out.  (Why can't I get small amounts of buttermilk?). So I don't like to buy buttermilk.

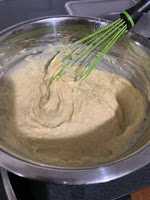
So I made them.  Several times in fact.  Now it is not a secret that I have little patience.  So although I knew (and the recipe said) that I should let the batter rest before I used it I didn't wait long enough the first few times.  The pancakes were still delicious, but when you have the patience to wait as long as you should they are better.  So I finally waited until I could see all the bubbles raised up and the batter
thick with them.  It will become so think that it will not be pourable.  The recipe says you can add milk but my pancakes are never round anyway so I left it thick plopped it in the pan and just spread it a little.


They are thick.  So once again my lack of patience is an issue.  You can not just crank the heat because they will start to burn before they are cooked through.  And once again waiting is a good thing.  Because if you can wait for the batter to rise correctly and for the thick pancake to cook though it is one of the fluffiest pancakes I have ever had.  (4 teaspoons of baking powder will do that.)

To finish them off you can do whatever.  Go traditional and use butter and maple syrup, or change it up with blueberry syrup (yum), jams and jellies, hazelnut chocolate spread, or anything else you like.  I'm sure it will all be good on this wonderful pancake base.

I love this recipe.  It is easy to make and delicious.  You can dress it up however you like to fit your tastes. And most of the ingredients are things you will probably have on hand.  I have made it a bunch of times and will continue to go back to it again and again.  I think you will too if you try it. 


Happy National Pancake day!!


Saturday, July 16, 2022

That's So Corny

Today (July 16th) is National Corn Fritters Day.  What does that mean to you?  Probably nothing.  But I
wanted to try corn fritters for Corn Fritters Day.  And since I don't know where to get ready made corn fritters I had to make my own.  I chose to use Quick and Crispy Corn Fritters from Small Town Woman, because both quick and crispy sounded like good qualities to me.  


Most of the ingredients you probably have in your house already.  I had everything but the actual corn.  You need 2 1/2 cups of corn for this recipe.  I bought two cans of corn and just had a little left over.  I used the optional creole seasoning because I happened to have some but if you don't, I don't think you need to go out and find some.

The batter comes together easily.  Kind of like making pancake batter.  So you just need a whisk and a bowl, not even a mixer or anything.

Once I had the quarter inch of oil heated I did the fritters in batches of three. 
I never had to add more oil but there wasn't much left by the end.  The recipe says to cook on each side until "golden brown and crispy".  But I didn't know how to judge that.  So, since it was like pancake batter, I judged it that way.  You will see bubbles rising up through the batter, and that's when I flipped them.  I had a bit of splashing with all the oil in the pan so just be careful...


They came out crispy on the outside and fluffy on the inside.  And you get the change of texture and the pop of freshness from the corn kernels.  I have never had corn fritters before, so I don't know how they compare to other corn fritters.  But these were delicious.  If you like corn, I don't know how you could not like these.  They are good all by themselves but I ate them with some chicken that had a creamy sauce and they were also very good with a sauce.  I had some left over that I ate a few days later.  They had lost the crispiness but were still fluffy and delicious.

They are a nice, rather quick, pretty versatile, delicious side dish.  I will be making these again.


Tuesday, May 10, 2022

Calling all Shrimp Lovers

Today (May 10th) is National Shrimp Day.  How do you celebrate National Shrimp Day?  You eat shrimp of course.


There are a million shrimp dishes out there to try so you have a lot of choices.  Maybe you can even try several dishes.  I mean, you are probably going to eat three meals today.  Why not make them all shrimpy?


The one I chose was Shrimp and Grits from the Food Network.  Why this particular Shrimp and Grits recipe?  Because of all the cheese obviously.  


I didn't try grits until later in life.  And the first time I tried them I was not impressed.  But I decided to give them a second chance.  I thought maybe what my first taste of grits was missing was 2 cups of cheese.  Turns out I like grits.  (I have tried them without the cheese.  I still liked them.)


It turns out that Shrimp and Grits is pretty easy to make.  The hardest part is deveining the shrimp.  I hate doing that.  It isn't so much that it's messy but that it takes me forever.  I keep hoping I will get faster with practice.  Problem is I don't practice very often.  So I'm still slow.  Now, the recipe says prep time is 15 minutes.  Those estimates are always wrong.  I always thought it was the time it took to prepare.  But now I think it does not take into account any chopping or, say, deveining that has to take place.  So if you have all your ingredients in the state they are asked for (i.e.. sliced, chopped, minced, deveined) then it will be 15 minutes of prep.  If not, you will need to add some time.  


All that being said, there are some things to chop and mince and juice.  But it is all simple cooking prep.  By the way, you will be surprised how hard it is to cut raw bacon.  Well, I was anyway.  


Now, the recipe calls for stone-ground grits.  I couldn't find any.  I just bought a can of store brand grits.  Which took about 5 seconds to cook as opposed to the 20 to 25 minutes the recipe says the grits will take.  You can make up some of that deveining time here.  But you need to watch them.  Because I'm not joking.  It's quick.  (Be careful when you are adding the salt.  Remember that you will be adding a lot of cheese to the grits and then bacon to the shrimp.)  Then you add 2 cups of cheddar cheese.  That is a lot of cheese.  I like cheese.  But that was a lot of cheese even for me.  But they were delicious so...


The shrimp are cooked in the grease left in the pan after you cook the bacon.  (You use 6 slices of bacon.  Which leaves you with left over bacon.  I mean, you can't let it go to waste.)  Then you add the other ingredients, like garlic and scallions and such and you are done.  All you have to do is spoon out the grits and put the shrimp mixture on top.


Grits do not reheat all that well.  If you do not eat them immediately they will not be the creamy, spoonable texture, they will be a solid, sliceable mass.  They will still taste good though.  I brought this for lunch, having made it the night before.  I put it all in the microwave.  The grits, as I said, were solid (but not hard) and the microwave didn't do the shrimp any favors either.  But it was what I had to work with and the food still tasted great.  Fresh, this is a delight.  With the creamy grits with the meltly cheese, and the firm but not rubbery (hopefully) texture of the shrimp and the bacon to add a nice savory, salty touch.  I think Shrimp and Grits would be a perfect way to celebrate this wonderful holiday.


Saturday, March 26, 2022

Eat Your Spinach!


Today (March 26) is National Spinach Day!  I know a lot of people will not be excited about that.  But you should be.  Spinach is nutritious and delicious.  I mean it.  I actually like spinach.  So to celebrate National Spinach Day I made Spinach and Feta Brownies from Hungry Happens.  


Now Dictionary.com defines brownie as:

        a small, chewy, cakelike cookie, usually made with chocolate and containing nuts


Merriam-Webster defines it as: 

        a small square or rectangle of rich usually chocolate cake often containing nuts


So not a brownie.  And this is not one of those brownies that you use to try to trick your kids into eating spinach.  This one is supposed to taste like spinach.


The flavor reminds me of spanakopita, but without the fillo dough crust.  Is has flour and baking powder so it does rise while baking and that makes it a little airy.  The texture is something like a fluffy omelet or a quiche.  But it doesn't taste like eggs even though there are eggs in it.  And it has three kinds of cheese, which is always a good sign.


It is relatively easy to make.  Once you sauté your scallions and wilt your spinach (which need to be done in two batches - it is a lot of spinach) all you need to do is mix everything together and a pan.  Don't forget to grease it.  I did and it stuck like crazy.


I had it in the fridge for about a week and it held up fine and heating it in the microwave worked well.


I happened to have been serving it with chicken shawarma (I used The Mediterranean Dish recipe which is also pretty easy to make and delicious.) so I had made tzatziki sauce.  (Also from The Mediterranean Dish.)  The "brownie" is good all by itself by I think it was better with a little tzatziki.  The only issue I had with this dish was the parmesan on top.  Don't get me wrong, I love parmesan.  But it had an almost sandy texture that I didn't really like.  But the taste was great.


I like this.  It comes together quickly (although it is in the oven for 40 minutes) and it is a nice change for my usual side dish choices.


Friday, March 4, 2022

Just Throw in a Pound of Everything


It is National Pound Cake Day!  And I believe that Pound Cake should be celebrated.  Because it is delicious.  It is not a complicated recipe, but it works.  Now, pound cake is called pound cake because way back when the recipe called for a pound each of butter, flour, sugar, and eggs.  That sounds like a heavy cake.  The one I made to celebrate was not quite so heavy.


There are a bajillion recipes for pound cake out there.  How do you choose which one to make?  I have no idea.  I didn't want a lemon one or an iced one or anything like that.  So, I just browed around until I found one that seemed like it would be close to the traditional pound cake I always think of when I think of pound cake.  I ended up choosing basically at random and settled on the one from Once Upon a Chef, hoping it was really the Perfect Pound Cake it claimed to be.  


Putting it together is as simple as the ingredients.  You do need cake flour for this one.  I happened to have had it in the house, so I was happy to have a use for it.  Everything else is stuff most people have in the house all the time - eggs, milk, butter and such.


You whisk the wet ingredients together.  You put the dry ingredients in the mixer.  I was surprised that I was told to put the flour in the mixer along with the sugar and before the butter.  I am used to mixing the sugar and butter together first.  But I follow the directions exactly the first time I do any recipe.  And it all worked out, so it shows you how much I know about baking even thought I do it all the time.  


Then you add the butter and wet ingredients and you are all done.  All you have left to do is pour it into a greased and floured pan and put it in the over for almost an hour.  


What you get is a buttery, slightly dense (as pound cake should be), delicious treat.  Very much like the pound cake I had in mind, that I remembered from those ones that we got from the store in an aluminum tray when I was a kid.


It may not be perfect but it is close.


Sunday, February 6, 2022

What the heck is Galliano?

 I like to try new cocktails and will sometimes pick one at random to try on the weekend.  Sometimes it is one that I have heard of before but never really knew what was in it.  This time it was the Harvey Wallbanger.  That's how I ended up with a bottle of Galliano.  


I had never heard of Galliano so when I went to the liquor store I had no idea what I was looking for.  But there it was on the shelf with the other liquors that really don't have a category, like Kahlua and amaretto and schnapps.  There was just the one type there, I later learned that Galliano has several different types.  I got the Autentico.  Just by happenstance.  (All the recipes that follow use Autentico.)


Galliano comes in this ridiculously tall bottle.  I felt a little silly bringing it up to the counter.  But I was determined.  So...


I get it home and take a taste.  First thing I notice is that it is hard to control the pour because the balance of the bottle is weird and when all the liquid shifts it tips more than you expect.  You have to learn where to hold the bottle so you can control it.  It is sweet and the predominant flavor is anise.  It is not something I would want to sip on all by itself.  But I found out it makes some great cocktails.  (And some not so great cocktails.)  And at 84.6 proof it is no lightweight.  


Harvey Wallbanger
So it all started with the Harvey Wallbanger.  It is orange juice, vodka and Galliano.  Unfortunately I didn't really like it.  The oj and Galliano didn't seem to blend well.  But it is a well known cocktail so maybe I'm crazy.


One that worked out better was Root Beer.  It has Kahlua and cola in it and somehow taste very much like root beer.  If you like root beer you will like this one.


The Barracuda has kind of a lot of ingredients with rum, pineapple juice, lime juice, and champagne on
top of the Galliano.  I think the slightly sweeter pineapple is a better mix with the Galliano and the champagne gives it a nice fizz.  


The Freddy Fudpucker is another orange juice concoction but this one has tequila.  This isn't one I'm likely to repeat either but I liked it better than the Harvey Wallbanger.  I think the strong flavor of tequila was a benefit over the neutral vodka.


Livorno Cup

The Gin and Galliano Sour is pretty straight forward.  You get exactly what you expect.  The ratio between the gin and Galliano is heavily weighted toward the gin.  I think if you like gin you will like this.


The Livorno Cup is another one that has a longer list of ingredients.  With gin, vermouth, lime juice, and ginger beer I really didn't know what to expect with the combination.  The balance is nice though.  You have the sweet Galliano and the bitter vermouth, the herbal gin that goes well with the anise from the Galliano and the ginger beer adds that slight bite while blending everything together and giving it a nice fizz.  


If you like bourbon you will like the Galliano Old Fashioned.  It tastes very much like a regular Old Fashioned with just a hint of the sweet anise in the background.


The Yellow Bird was one of my favorites.   Rum and Triple Sec to go with the Galliano with a touch of lime.  The sweet Triple Sec is a nice compliment to the Galliano.  


Beckoning Lady

The Beckoning Lady proves that passion fruit juice makes great cocktails.  And tequila with a nice fruit juice is always a good option.

Golden Cadillac

The Golden Dream is another orange juice one.  I like this one.  I guess it isn't the orange juice I don't like so much but it needs something else in the mix.  With cream and triple sec it turns into a creamy creamsicle treat.


The Golden Cadillac is another creamy treat.  And with the addition of creme de cacao it reminds me a little of Irish Cream.  

Monday, January 24, 2022

Peanut Butter Rules!

 Today is National Peanut Butter Day.  (Not to be confused with National Peanut Butter Lovers Day in March.)  


There are many ways to celebrate National Peanut Butter day.  You can eat a peanut butter and jelly sandwich, have peanut butter on crackers (have you tried mixing some honey in you peanut butter?  It's delicious) or you can just have a big spoonful of peanut butter.  OK.  Well, I guess basically there is only one way to celebrate.  Eat peanut butter.  But I'm ok with that. 


So when I want to eat peanut butter in an altered form instead of straight from the jar one of my go to recipes is Chocolate Peanut Buddy Bars from Very Best Baking.


They are pretty simple to make and most of the ingredients I always have on hand.  The only thing I have to buy most of the time is a bag of chocolate chips.  


You beat the butter and the peanut butter together (sometimes I even remember to leave the butter out to soften first).  I like to spray a little cooking spray in my measuring cup when I am measuring the peanut butter so I can get it out more easily.  Then you add the other ingredients, but only 3/4 of a cup of the chocolate chips.  Put that in a 13 x 9 pan and stick it in the oven.  25 minutes later you pull it out and pour the rest of the chocolate chips on top.  You let the chips melt and then spread them out into an even layer.  I have burned myself a couple of times on this step but then I got smart and started using an offset spatula.  It makes it so much easier.  I like to put them in the refrigerator for a few minutes to set up the chocolate. 


Cut them up and you get a delicious peanut butter treat.  They are soft and not too sweet with just the right amount of peanut butter.  I mean, how can you go wrong with peanut butter and chocolate?  They are easy and quick to make and they are always a hit when I make them.  And I HAVE to share them or I will eat the whole batch.  


Monday, January 17, 2022

Did you know there is a Hot Buttered Rum Day?

 There is such a thing as National Hot Buttered Rum Day.  And today is the day!  January 17th is National Hot Buttered Rum Day.


So I found out there was a day for hot buttered rum and I decided to try it.  I looked around for a recipe and they all had basically the same ingredients but I decided to go with the one from The Spruce Eats because it was a recipe for one cup as most of the other recipes were for four or more and used a whole stick of butter.  


I Googled what the best rum to use would be and there was a difference of opinion.  But the words I saw the most were Jamaican rum and dark rum.  So I went to the rum section of the liquor store and looked around.  And saw that Myers's Rum was both Jamaican and dark.  I figured that would be a good choice.


Make sure you leave the butter out to soften long enough before you want to make the drink.  Because you are supposed to mix the butter with the brown sugar and spices, and it is so much easier if the butter is nice and soft.  But then you have butter and sugar in the glass and then you add alcohol.  So it is basically a cup full of vices.  But it is just a little bit of each so I didn't feel too badly about it.


I worried that it would be too watered down, or that it would be weirdly greasy but it was neither.  It was a nice warm drink full of all those warm spices that you associate with winter that would be great on a cold evening.  It is not something I would drink on a regular basis but it is a nice treat for a cold night curled up on the sofa.

Tuesday, January 11, 2022

OK, I like Tangerines, I'll Bite

 So Instagram is always showing me posts that it thinks I will like.  So they are mostly about food with some cute animal photos thrown it.  It also seems very interested in getting me to watch the Yellowstone series.  I don't know why.  But it is right about the food and the cute animals so maybe I should give it a try.


Anyway.  One of the post was a video on how to make Tangerine Muffins from Cookist Wow on YouTube.  These were unusual muffins in that they had a whole half of a tangerine baked into the bottom of the muffin.  Now I was skeptical because it seemed like having something with so much moisture at the bottom of the muffin would be a problem.  But they looked cool so I wanted to try them out.


They were easy to work up and had the added bonus of using oil so it was easy to mix by hand and I didn't have to pull out or wash my stand mixer.


I did exactly what the video showed me.  I spooned a little sugar on the bottom of the muffin cups, put the tangerines in cut side down, covered them with the batter and baked them.


Simple enough.  Only they didn't turn out so great.  They looked cute.   When you cut them you got the semicircle of the tangerine on the bottom of the muffin.  They looked like they would taste great.  Unfortunately I didn't like them.  The tangerine had turned bitter and the skin on the segments was tough to bite through.  The cake part did not rise very much so it was dense.  And overall it just didn't have that much flavor.  


I ended up throwing most of them away.  I love a citrus muffin but this one just didn't work out. 


Thursday, November 18, 2021

Who doesn't love filled pasta?

 I love filled pasta dishes.  The fact that filled pastas are usually filled with cheese probably has something to do with that.  And then if you add beef, well, that just makes everything better. So I couldn't resist a recipe called Beef and Cheese Manicotti from the Food Network.


You have to cook the manicotti first and right out of the pot some of my manicotti were already broken.  But whatever, they taste the same.  While they were cooking I sautéed the onion and beef.

Making the filling is not complicated but then you have to get it into the manicotti.  There was no hint on how to do that.  Last time I made manicotti I tried the pastry bag made out of a zip top bag technique.  That didn't work for me.  But I am not very good with a pastry bag so if you have any skill in that area you might want to give that a try.  I just used a tablespoon and carefully pushed the filling in until it was halfway full and then did the same thing form the other side.  I packed them as full as I could and had a little sticking out the ends and had plenty of filling.  So don't skimp.  A few more manicotti broke during this stage.  


Then I had to get them in the pan.  I thought that would be the easy part but it was a really tight fit.  I had less than half in the pan when I realized I was going to have trouble.  I thought about moving them around like some sort of pasta puzzle but I decided to just push on.  In the end I had to cut on in half and just cram it in wherever I could.  But, as I kept reminding myself, it would all taste the same.  


Some cheese on top (more cheese, I love it) and in the oven it goes.  Half an hour later you have beautiful manicotti.  I don't really know how you can go wrong with pasta and cheese and this case is no different.  It is very tasty.  If you like ricotta cheese you can't help but like this.  And it is very filling.  It makes a good hardy meal.  The only thing I might do differently is add a little crushed red pepper to the cheese filling next time.  But I like some sort of hot pepper element in just about everything I eat so that might just be me and my unnatural love of heat.  

I think pasta is a great way to go when you are unsure what to make for dinner.  This one is a little more work than just boiling some pasta and heating up some store bought sauce (which is also tasty by the way) but I do think the extra work is worth it.  I like manicotti and I can find no reason to go looking for a different recipe than this,


Tuesday, October 5, 2021

Super Simple Fish

 Somewhere in life I got the idea that cooking fish was a difficult process.  I don't know where I got the idea but it stuck with me for a long time in life.  And I wasn't sure I wanted to cook fish enough to actually put the time and effort into learning how.  So almost all of the fish (and, in fact, all seafood) I ate was cooked by someone else.  But then I got married.  And not only was he a seafood lover, he was a seafood cooker as well.  My new husband finally managed to convince me that cooking fish was no harder than cooking anything else.  Nowadays I cook seafood on a regular basis.  One of the fish I tend to cook a lot of is tilapia.  And in my search for a recipe for tilapia I came across this one simply called Pan-Fried Tilapia from Delish.


I already had everything I needed except for the fish itself and it said the total time to prepare this fish was only 25 minutes.  It sounded perfect.  And it turned out to be pretty close.


All you do is mix flour with a couple of spices, season the fish with salt and pepper, and then dip the fish in the flour mixture.  Then you put it in a pan that you have heated some oil in, leave it there for a couple of minutes, turn it over, leave it there for a couple of minutes, and you are done.  And you have four tasty fillets of tilapia.  


I served it just as is with some asparagus.  But I also made some really good fish sandwiches with it.


The only issue I had (and a slight one) is that even after all the fish has been covered in the flour mixture there is a lot left over.  The second time I made this I used half the flour (but the same amount of everything else) and still had plenty to cover my fish. 


I like this recipe because it is quick and easy and also because just the light dredging in the flour mixture mixture imparts a lot of flavor without having to put a heavy breading or batter on your fish.


Sunday, September 12, 2021

I Love Noodles!

 I love noodles (especially Asian noodles) and peanut sauce.  So I was very happy when I found this recipe for Asian Peanut Noodles with Chicken on Skinny Taste.


So this time I came really close to following the recipe.  But.  Well, I never really use chicken breast for anything so I used thighs.  Also I used regular peanut butter.  So basically I changed everything that made it healthier so it wasn't so 'skinny' anymore.  But it was tasty.


There is a little prep work.  You need to cut the chicken into strips, grate some ginger, crush or mince some garlic and chop some peanuts.  But there isn't that much to do.  I shredded my own carrots because I had some in the fridge but you can buy some already shredded to save time if you want.  


The recipe says to boil the water for the noodles but it also says cook them according to the package directions.  Well, the package said to put them in really hot tap water.  So I did.  But they did not seem to be getting as soft as I wanted them so I did add boiling water to the bowl to help them along and that seemed to work.  The next hiccup I ran into was with the garlic.  Now, I know you are supposed to read the recipe all the way though before you start to cook.  But I didn't.  So when it said in the ingredients list to mince two cloves of garlic for the peanut sauce, I did,  But the directions say to add three cloves of crushed garlic.  I went with the two minced.  And the ingredients list for the chicken said four cloves.  And then it said to put the garlic in with the chicken strips.  So I put it all in with the chicken.  So when later it said to put two cloves in with the vegetables I thought that might be too much garlic so I didn't.  But maybe the intention was that half go in with the chicken and half with the veggies?  I might do it that way next time.  But what I did worked just fine. 


I chose to mix the veggies in with everything else.  I just found it easier that way.  I think it would have been a prettier dish if I put them on top.  But it certainly didn't hurt the flavor.  I will hold onto this recipe and make it again.


Monday, July 26, 2021

Well, I Sort of Followed the Directions

 So, I realized recently that I almost always just kind of, sort of, follow a recipe.  I usually start out planning to follow the recipe exactly but it just doesn't work out that way.  


Like when I was looking for a nice grain bowl or grain salad to make for lunch I found this recipe for Cranberry-Pecan Wheat Berry Salad from Taste of Home.  It looked good in the picture and the ingredients all sounded good.  So I started to make my shopping list.  Well, I didn't have any wheat berries.  I was going to put them on my list when I realized I had a whole bag of farro.  So why not just use what I had on hand.  How different could they be, really?  And then I got to walnut oil.  Walnut oil?  I didn't even know they sold bottles of walnut oil until I read this recipe so I was pretty sure I was never going to have a use for it again and I didn't want to buy a bottle of something that would just sit around forever.  So I used olive oil instead.  Everything else I did according to the recipe.  Although I will admit that some of the quantities were eyeballed.  


As with a lot of grain salads like this one there is not a lot of cooking to do.  You have to cook the grain but that is mostly just waiting. You combine all the ingredients for the dressing in a bowl (All of which I had on hand except the walnut oil.  I like when that happens and I get to use what I have instead of having to buy a bunch of ingredients.)  There is sage and thyme in the dressing.  The recipe gives you the amount to use for either fresh or dried.  I used dried because I had them and I have a habit of only using a small amount of fresh herbs and having to throw away the rest.  Then there is a little bit of chopping to do.  And the rest is just mixing everything together.  So nothing too complicated or time consuming.  


It made for a very satisfyingly and filling lunch.  The very savory dressing matches well with the fruit so it has a nice balance.  The apple gives you a nice crunch for a nice texture against the chewy grain.  I think it was the sage and thyme in the dressing but there was something about it that made me think of Thanksgiving.  It reminded me of the stuffing my mother would always make.  


Sometimes when there is no meat or cheese in lunch I feel the lack of it.  But in this one I don't.  It was definitely a full meal.  I will keep the recipe on hand and maybe even use wheat berries next time.  Or barley or quinoa or whatever.  


Tuesday, July 13, 2021

Maybe I Should Get a Wok

So I wanted to try to make Drunken Noodles.  I love Drunken Noodles.  I do not own a wok and I have tried to make other dishes that tell you to make them in wok and I figure 'how much difference can it make' and it doesn't turn out well.  And I have also tried to make other rice noodle dishes that have not ended well.  But despite my past failures and the fact that I still don't own a wok I decided to try again. 


Spoiler Alert: it went much better this time.  


I used the recipe for Drunken Noodles (or Pad Kee Mao apparently) from The Woks of Life.


There are a million different recipes out there but this is one of the ones that told me to use Thai chilies instead of a chili paste or something.  And I just liked the looks of it.

I started to gather my ingredients.  I could not find rice noodles as wide as the ones I would usually get from the restaurants so I settled for ones that looked liked fettuccini.  I could not find Shaoxing Wine, so I got mirin.  And I used just regular basil, not holy or Thai.  And I'm sure I had more chicken than I was supposed to.  But whatever.


The directions for the noodles said to let them sit in really hot water.  So they were easy to cook.  Then there is a fair amount of chopping to do.  I added an extra Thai chili, because I like heat and well, I had to buy a box of like a hundred so why not.  


Then it is basically adding the ingredients to the wok (or in my case a skillet) when you are told to.  My skillet was just a little too small so stirring wasn't the easiest.  And I don't know if having a wok would help or if I got the noodles too soft before I added them to the pan or if I'm just a brute but I break up the noodles quite a bit in the process.  The finished product did not look exactly like the Drunken Noodles I have eaten before but it was pretty close.  Closer than I expected.  And much closer than my last rice noodle effort.  I was very pleased.  It got even better when I ate them.  They were just what I was hoping for.  I will make them again.  Maybe in a wok next time.


Sunday, April 25, 2021

If You Like Avocados, Try This

 I found this Avocado Dip Recipe because I needed something to put on my Quinoa and Spinach Patties.  (Those are also pretty good.  So if you like quinoa you should try those too.  They are from Skinny Taste.)


My husband and I have been trying to make lunches that are not just a bunch of deli meat sandwiches. We aren't going crazy with health food.  Just trying to get in some vegetables and grains sometimes.  So quinoa patties.  But I thought they could use a little something.  So I browsed around and found this Avocado Dip Recipe from Dinner At The Zoo.  


It is easy to make.  You basically just throw all the ingredients in the food processor and blitz it until it is smooth.  So it doesn't take long to whip up.  All of the lime juice stops the avocado from turning black so it keeps in the fridge for a couple of days so you can make it ahead if you like.  


It has a nice fresh taste.  Kind of refreshing.  I actually put extra jalapeno in mine because I like the heat but you, of course, can put as much or as little as you like to control the heat level.  There is some sour cream in this but I like that it is not mostly sour cream or mayonnaise.  And lets face it, I love cilantro and will put it on or in almost everything.  So I'm happy to have so much in this.


Like I said I put it on the Quinoa Patties and really enjoyed that. And then when I was making Quick and Easy Salmon Cakes later (from Feasting At Home) I remembered this Avocado Dip and made it again and again was pleased with what it added to the dish.  I can see myself putting this on all sorts of things.  It is recommended that you put it on chips, crackers or veggies, and I can see all of those choices being very tasty.  I could also see myself using this as a spread on a chicken sandwich.  I think it would fit in a lot of different places.  I will hold onto this recipe because I'm sure I'll be making it again.

Tuesday, April 28, 2020

Sort of a Banh Mi - Recipe Review

I like banh mi.  So when I saw a recipe where I could make one at home without worrying about finding or, good heavens, making the pate I was very happy.  So I gathered my ingredients to make Shortcut Banh Mi With Pickled Carrots and Daikon form NY Times Cooking.


Most of the ingredients were easy to find.  In fact I had a couple in my house already.  But the daikon was a bit tricky.  I had to try several grocery stores until I found it.  And actually, the second time I made this recipe I couldn't find it at all.  I thought about using a different kind of radish or a parsnip or something but ending up just using more carrots and cucumbers instead.  And it was still delicious.

The recipe is also easy to make.  The hardest part is all the chopping.  But after you have chopped everything it is basically just adding everything to your skillet in the right order.  You do have to pickle the vegetables before you start cooking because they have to sit in the vinegar for a half hour at least so you want that going while you cook.  It is a very light pickle.  More like vegetables in a vinegar dressing but you still get the nice bite of a pickle without much time.

There is a little heat to it.  You put sriracha in the pork filling while you are cooking it.  Of course, if you don't like things spicy you can put less in.  I would suggest you don't leave it out completely though.  It does add a nice flavor.  You can always cut down on the heat by putting just a few slices of jalapeno on at the end.


Is it a banh mi? Not really.  But it says right on the recipe that authenticity was not the goal.  The result, however, is a delicious sandwich that gives you the feel of a banh mi.  I have used this recipe several times and will keep it on hand because I know I will want to use it again.

Saturday, January 21, 2017

Birthday Swiss Roll

It was one of my co-worker's birthday and for some reason when I was trying to decide what to make to bring him I decided on a Swiss Roll.  Usually I wouldn't bring something to share with people that I haven't tested before hand but I took the risk this time.  Even though the only other time I tried to make a roll it did not go well.  Spoiler Alert! This time I had much better luck.

I found the recipe on The Kitchenthusiast.  You can find it here.  It is a KitchenAid blog so there is some product placement in the recipe but I'm sure you don't actually have to use a KitchenAid mixer to make this.

You need a jelly roll pan, some parchment paper and a cooling rack.

None of the various pieces are hard to make. It did not seem like I had enough cake batter to spread over the entire pan but I spread it thin and managed it.  The edges were not as thick as the middle and I had to cook it longer than the recipe said so the edges got a little crunchy but I was still able to roll it up without much problem.  But then you have to wait.


You can make the filling while it cools but I was done with the filling before the cake was cool enough to frost.  You add some heavy cream right at the end and beat it a lot.  I did have to add a little extra powered sugar because it was too soupy.  But once I did it turned into a light and fluffy delicious filling.  I wanted to eat it by the spoonful. When I rolled it back up after putting in the filling the edges were not exactly lined up and since the edges were thinner it didn't look that neat on the ends.  Next time I think I will trim the edges just to make it look a little nicer.  But I was just happy that I got it rolled up without it cracking up on me.


When I made the chocolate glaze it seemed way to runny so I put it in the fridge for a while before I tried to put it on the cake.  It was a messy process.  There was chocolate dripping everywhere.  I only ended up putting about half of the glaze on the cake because by that point it was all dripping off and it seemed to have a nice coating anyway.  Then back in the fridge to set everything up.

The finished product was seriously good.  The recipe says to use dark chocolate for the glaze, so I did, even though I'm not really a fan of dark chocolate.  And I'm glad I did.  The filling is really sweet and if I had used a sweeter chocolate I think it would have been too much.


I was a little disappointed because it did not come out round.  As you can see it was oval.  The cake could not support its own weight and ended up slouching.  I don't know why.  I wonder if I did something wrong.  But I didn't worry about it for long.  Because it didn't affect the taste.  Which was awesome.  Just the right balance of everything.  Nice moist fluffy cake and creamy filling.  All the guys at worked loved it.  And I already have a request to make this for another birthday.  This one is a keeper.  It is a little time consuming but it is worth it.

Weekend Cooking is sponsored by Beth Fish Reads.  See the other posts here.